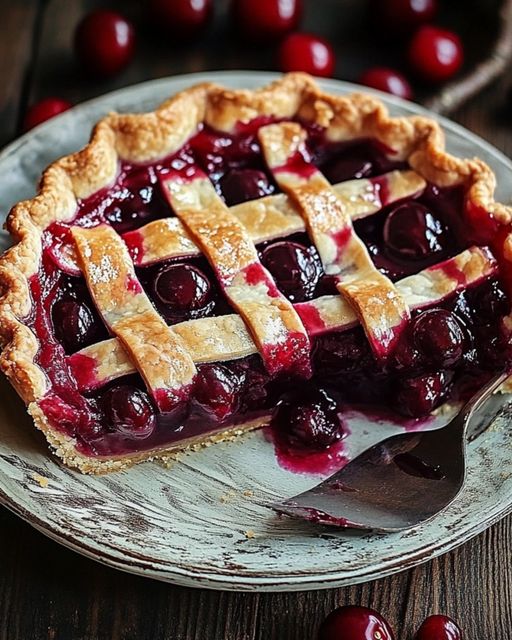
Classic Homemade Cherry Pie with a Perfect Lattice Crust
Introduction
Nothing says “comfort food” quite like a homemade cherry pie. The sweet, tangy filling made with fresh cherries, paired with a perfectly flaky crust and a beautiful lattice top, is the epitome of classic dessert perfection. This cherry pie recipe is not only delicious but also looks impressive on any table. Whether you’re baking for a special occasion or just because, this pie will always be a crowd-pleaser. Follow this step-by-step guide to create a pie that’s both gorgeous and mouthwatering.
Ingredients
For the Pie Crust:
- 2 1/2 cups all-purpose flour
- 1 tablespoon sugar
- 1 teaspoon salt
- 1 cup unsalted butter, cold and cut into cubes
- 4-6 tablespoons ice-cold water
For the Cherry Filling:
- 5 cups fresh cherries, pitted
- 1 cup granulated sugar
- 1 tablespoon lemon juice
- 1/4 teaspoon almond extract (optional)
- 3 tablespoons cornstarch
- Pinch of salt
For the Lattice Topping:
- 1 egg, beaten (for egg wash)
- 1 tablespoon coarse sugar (optional, for sprinkling)

Directions
Step 1: Prepare the Pie Crust
- In a large mixing bowl, combine the flour, sugar, and salt.
- Add the cold butter cubes to the flour mixture and use a pastry cutter, or your fingers, to cut the butter into the flour until the mixture resembles coarse crumbs with pea-sized pieces of butter.
- Slowly add ice-cold water, one tablespoon at a time, mixing until the dough begins to come together.
- Divide the dough into two equal portions, shape them into discs, wrap them in plastic wrap, and refrigerate for at least 30 minutes before rolling.
Step 2: Make the Cherry Filling
- In a large bowl, combine the fresh cherries, sugar, lemon juice, almond extract (optional), and salt. Toss gently to combine.
- In a separate small bowl, mix the cornstarch with a couple of tablespoons of water to create a slurry. Stir this into the cherry mixture.
- Transfer the cherry mixture to a saucepan and cook over medium heat, stirring constantly until the filling thickens and becomes bubbly. Remove from the heat and allow it to cool completely.
Step 3: Assemble the Pie
- Preheat the oven to 375°F (190°C).
- Roll out one disc of dough on a lightly floured surface into a 12-inch circle, then transfer it to a 9-inch pie dish. Gently press the dough into the dish and trim the excess.
- Pour the cooled cherry filling into the pie crust, spreading it evenly.
- Roll out the second disc of dough and cut it into 1-inch strips. Create a lattice pattern on top of the filling by laying the strips of dough in a crisscross fashion.
- Trim the edges of the dough and pinch the lattice and bottom crust together to seal.
- Brush the lattice top with a beaten egg to give it a golden finish while baking. Optionally, sprinkle with coarse sugar for an added sparkle.
Step 4: Bake the Pie
- Place the pie on a baking sheet to catch any drips and bake it in the preheated oven for 45-50 minutes, or until the crust is golden brown and the filling is bubbling through the lattice.
- Allow the pie to cool for at least 2 hours before serving to ensure the filling sets properly.
Tips for Perfecting Your Cherry Pie
- Use Cold Ingredients: Cold butter and ice-cold water are key for achieving a flaky, tender crust.
- Lattice Technique: If you’re new to making a lattice crust, practice with the strips of dough before placing them on the pie. You can even cut the dough into shapes if you prefer a decorative look.
- Prevent a Soggy Bottom: To avoid a soggy crust, you can pre-bake the pie crust for 10 minutes before adding the filling. This will help the crust stay crispy.
- Chill the Dough: Resting the dough in the fridge before rolling it out helps prevent shrinkage during baking.
Conclusion
This cherry pie is a showstopper—bursting with sweet and tangy fruit, encased in a buttery, flaky lattice crust. Whether you’re baking for a holiday celebration or simply treating yourself, this classic cherry pie will never disappoint. With simple ingredients and an easy-to-follow recipe, you’ll create a pie that’s both stunning and delicious. So grab your apron, roll up your sleeves, and bake this beautiful cherry pie today—your family and friends will be asking for seconds!